


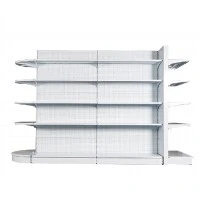
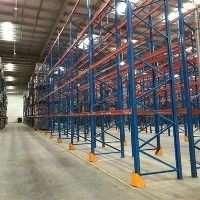
As a trusted supplier of Display Supermarket Racks, I understand the importance of a well - installed rack system in a supermarket. A properly installed rack not only enhances the aesthetic appeal of the store but also maximizes storage space and improves the shopping experience for customers. In this blog, I will guide you through the step - by - step process of installing display supermarket racks.
Step 1: Planning and Preparation
Before you start the installation process, it is crucial to have a detailed plan. First, measure the available space in your supermarket. Consider the layout of the store, the flow of customers, and the types of products you will be displaying. This will help you determine the number, size, and configuration of the racks you need.
You can explore our wide range of products, such as Single - side Supermarket Shelf, Grocery Store Display Racks, Superstore Retail Shelving, Lozier Gondola Shelving, and Steel Wood Supermarket Shelves. These products come in various sizes and styles to meet your specific needs.
Next, gather all the necessary tools for the installation. You will typically need a drill, a screwdriver, a level, a tape measure, and safety equipment such as gloves and safety glasses. Make sure the tools are in good working condition.
Step 2: Unpacking and Inspection
Once you have received your display supermarket racks, carefully unpack them. Check each component for any damage during transit. Look for bent or broken parts, missing screws or brackets. If you find any issues, contact our customer service team immediately. We are committed to providing high - quality products, and we will assist you in resolving any problems.
Lay out all the components in an organized manner. Refer to the installation manual that comes with the racks to identify each part. This will make the installation process much smoother.
Step 3: Assembling the Uprights
The uprights are the vertical columns of the rack system. Start by assembling the uprights according to the manufacturer's instructions. Usually, this involves connecting different sections of the upright using bolts or clips. Make sure the connections are tight and secure.


Use a level to ensure that the uprights are perfectly vertical. This is important for the stability of the entire rack system. If the uprights are not straight, the shelves may not sit properly, and the rack may be prone to tipping over.
Step 4: Installing the Beams
The beams are the horizontal components that support the shelves. Attach the beams to the uprights at the desired heights. Most rack systems use a slot or hole system on the uprights for the beams to fit into. Insert the beams into the appropriate slots and secure them using the provided fasteners.
Again, use a level to make sure the beams are horizontal. The height between the beams can be adjusted according to the size of the products you will be displaying. Leave enough space between the beams to accommodate the items and allow for easy access.
Step 5: Adding the Shelves
Once the beams are in place, it's time to install the shelves. Slide the shelves onto the beams. Some shelves may have tabs or brackets that need to be inserted into corresponding slots on the beams. Make sure the shelves are evenly spaced and level.
If you are using wire shelves, you may need to attach additional support bars or clips to prevent the shelves from sagging under the weight of the products. For wooden or metal shelves, ensure that they are firmly attached to the beams.
Step 6: Securing the Rack to the Floor
To enhance the stability of the display supermarket racks, it is recommended to secure them to the floor. This is especially important in areas with high foot traffic or in stores located in earthquake - prone regions.
Use floor anchors or brackets to attach the uprights to the floor. Drill holes in the floor at the appropriate locations and insert the anchors. Then, attach the uprights to the anchors using bolts. Make sure the rack is firmly attached to the floor to prevent it from moving or tipping.
Step 7: Final Checks and Adjustments
After the installation is complete, conduct a final inspection of the rack system. Check all the connections to ensure they are tight. Make sure the shelves are level and can support the weight of the products.
Test the stability of the rack by gently pushing on it. If you notice any wobbling or instability, make the necessary adjustments. This may involve tightening bolts, re - aligning beams, or adding additional support.
Step 8: Organizing the Display
Once the racks are installed and stable, it's time to organize the display. Group similar products together and arrange them in an attractive and easy - to - access manner. Consider using signage and labels to help customers find what they are looking for.
Contact Us for Your Supermarket Rack Needs
Installing display supermarket racks can be a complex but rewarding process. By following these steps, you can ensure a successful installation that will enhance the functionality and appearance of your supermarket.
If you are interested in purchasing high - quality display supermarket racks, please feel free to contact us. Our team of experts is ready to assist you in choosing the right products for your store and providing you with professional installation guidance. Whether you need Single - side Supermarket Shelf, Grocery Store Display Racks, or any other type of supermarket racks, we have the solutions you need.