



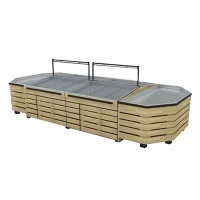


Hey there, wine enthusiasts and business owners! As a supplier of Commercial Wine Racks, I've seen my fair share of wine rack installations. And let me tell you, installing a double-sided commercial wine rack is no walk in the park. But with the right approach, it can be a smooth and rewarding process. In this blog post, I'm going to share with you the best way to install a double-sided commercial wine rack, based on my experience in the industry.
Step 1: Plan Your Installation
Before you even think about picking up a tool, you need to have a solid plan in place. This means measuring the space where you want to install the wine rack, taking into account the height, width, and depth. Make sure you have enough room for the double-sided rack, as well as enough clearance around it for easy access.
You'll also want to consider the layout of your space. Think about how you want to organize your wines, and how the double-sided rack will fit into your overall design. Do you want to display different types of wines on each side? Or maybe you want to create a focal point in the middle of the room. Whatever your vision, make sure it's well thought out before you start the installation.
Another important aspect of planning is to gather all the necessary tools and materials. You'll need a drill, screws, a level, a measuring tape, and possibly a ladder. Make sure you have everything on hand before you begin, so you don't have to stop in the middle of the installation to run to the store.
Step 2: Prepare the Wall or Surface
Once you have your plan in place, it's time to prepare the wall or surface where you'll be installing the wine rack. If you're installing the rack on a wall, make sure it's clean and free of any debris. You may need to sand the surface to ensure a smooth finish.
If you're installing the rack on a freestanding structure, such as a column or a partition, make sure it's sturdy and able to support the weight of the rack and the wines. You may need to reinforce the structure if necessary.

Next, mark the location where you want to install the rack. Use a level to make sure the marks are straight and even. This will help ensure that the rack is installed correctly and looks professional.
Step 3: Assemble the Wine Rack
Now it's time to assemble the double-sided commercial wine rack. Most wine racks come with detailed instructions, so make sure you read them carefully before you start. You'll typically need to attach the side panels, shelves, and any other components using screws or bolts.
As you assemble the rack, make sure all the parts fit together properly. Use a level to check that the rack is straight and level. If you notice any issues, such as misaligned parts or loose screws, address them immediately.
Once the rack is assembled, it's a good idea to test it to make sure it's stable. Gently shake the rack to see if it wobbles or feels unstable. If it does, you may need to adjust the assembly or reinforce the structure.
Step 4: Install the Wine Rack
With the rack assembled and ready, it's time to install it on the wall or surface. If you're installing the rack on a wall, use a drill to make holes in the wall at the marked locations. Make sure the holes are the right size for the screws you'll be using.
Next, insert the wall anchors into the holes. Wall anchors help to provide extra support and prevent the screws from pulling out of the wall. Once the wall anchors are in place, attach the rack to the wall using the screws. Make sure the rack is level and secure.
If you're installing the rack on a freestanding structure, you'll need to use a different method. Depending on the structure, you may need to use brackets or bolts to attach the rack. Make sure the rack is securely attached to the structure and that it's level.
Step 5: Add the Wine Bottles
Once the wine rack is installed, it's time to add the wine bottles. This is the fun part! Start by organizing your wines according to your plan. You may want to group them by type, region, or vintage.
As you add the bottles to the rack, make sure they're placed securely. You don't want them to fall off or tip over. You may need to adjust the spacing between the shelves to accommodate different bottle sizes.
Once all the bottles are in place, take a step back and admire your handiwork. You now have a beautiful and functional double-sided commercial wine rack that will enhance the look of your space and make it easier to store and display your wines.
Step 6: Maintenance and Care
Now that your double-sided commercial wine rack is installed and filled with wine, it's important to take good care of it. Regular maintenance will help ensure that the rack lasts for years to come and that your wines are stored properly.
One of the most important things you can do is to keep the rack clean. Dust and dirt can accumulate on the shelves and bottles, so it's a good idea to wipe them down regularly with a soft cloth. You can also use a mild cleaner to remove any stubborn stains or marks.
Another important aspect of maintenance is to check the rack for any signs of wear or damage. Over time, the screws may become loose, or the shelves may start to sag. If you notice any issues, address them immediately to prevent further damage.
Finally, make sure you're storing your wines properly. Wines should be stored in a cool, dark place, away from direct sunlight and heat. The ideal temperature for storing wine is between 55°F and 65°F. You may also want to consider using a wine cellar or a wine cooler to provide the optimal storage conditions.
Conclusion
Installing a double-sided commercial wine rack can be a challenging but rewarding project. By following these steps and taking the time to plan and prepare, you can ensure that your installation is a success. And if you're in the market for a high-quality commercial wine rack, look no further than Commercial Wine Racks. We offer a wide range of wine racks to suit your needs and budget, and our team of experts is always available to help you with your installation.
If you have any questions or need further assistance, please don't hesitate to contact us. We'd love to hear from you and help you create the perfect wine storage solution for your business.