


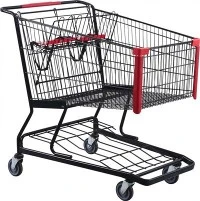
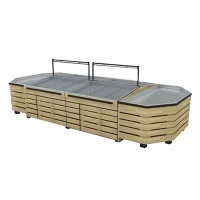

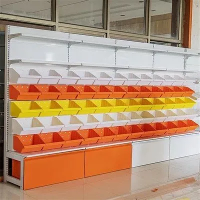
If you run a small grocery store, a home kitchen with limited counter space, or a farmers' market stall, you know how critical it is to keep fresh produce organized, accessible, and easy to move around. As a supplier specializing in durable storage solutions, I've worked with countless customers who start with a solid Iron Vegetable Racks for their produce and later realize they need to make it mobile. The good news? Adding casters to an iron vegetable rack is a straightforward, budget-friendly project that anyone can tackle in an afternoon-no advanced tools or construction experience required.
Before we dive into the step-by-step process, let's talk about why this upgrade is worth your time. A static iron rack is perfect for holding bulk potatoes, onions, or leafy greens, but being able to roll it to the prep area, tuck it out of the way when guests come over, or rearrange it for a farmers' market pop-up changes everything. I've seen Iron Fruit and Vegetable Rack units that were once confined to a corner become the star of a kitchen, simply because they could be easily repositioned. Even if you're using a commercial setup for a retail space, casters turn a fixed storage unit into a flexible display. Whether you're restocking, rotating produce, or rearranging for a sale, mobile racks save time and reduce strain on your back from hauling heavy crates.
But not all casters are created equal-especially for iron racks, which can hold 100+ pounds of produce when fully loaded. Choosing the wrong casters will lead to wobbly racks, stuck wheels, or even safety hazards, so let's start with the most important pre-installation step: picking the right hardware.
First, consider weight capacity. For standard residential Iron Vegetable Display Stand units, look for casters that can hold at least 50 pounds each-four casters would give you a total capacity of 200 pounds, which is more than enough for most home or small-market needs. For heavy-duty commercial applications, like Supermarket Metal Iron Fruit and Vegetables Shelving that might hold 500+ pounds, opt for casters rated for 150 pounds each, or heavy-duty industrial casters with rubber or steel wheels.
Next, wheel type matters. Iron racks are often used on concrete, tile, or wood floors. For smooth indoor surfaces, soft rubber or polyurethane wheels are ideal-they won't scratch floors, roll quietly, and absorb small bumps from uneven flooring. If you're planning to move the rack over outdoor surfaces (like a farmers' market tent floor or gravel), choose hard rubber or steel wheels that can handle minor rough terrain.
Finally, mounting style: this is where you need to match the caster to your rack's frame. Most iron vegetable racks have a flat, rectangular base at the bottom of each leg, where you can attach casters using a mounting plate. Avoid caster styles that screw into the side of the leg-these work for thinner frames but are less stable for heavier iron racks. Plate-mounted casters are the best choice for most iron units, as they distribute weight evenly across the base of the leg, reducing the risk of bending or breaking the frame.
Once you've got your casters and a few basic tools on hand, you're ready to start. Here's a breakdown of the tools you'll need: a drill with a Phillips head bit (or a socket wrench, depending on the caster's mounting hardware), a tape measure, a pencil, a level (optional, but helpful), and a rubber mallet (in case casters need a gentle tap to seat).
Now, let's walk through the installation step-by-step:
Step 1: Prep Your Workspace and Rack
First, clear a flat, open area-your garage, kitchen floor, or even a driveway works well. If your iron rack has any produce on it, empty it entirely for this step. Trying to install casters on a loaded rack is dangerous, as it will be top-heavy and hard to maneuver. Lay the rack on its side, making sure to place a soft towel or old blanket underneath to protect the iron frame from scratches, dents, or rust spots. This will also prevent the rack from sliding while you work.
Step 2: Locate the Mounting Points
Take a close look at the bottom of each leg. Most iron vegetable racks have pre-drilled holes for optional feet or leveling glides-these are perfect for your casters, as they'll line up exactly with the mounting holes on your caster plate. If there are no pre-drilled holes, measure 1 inch up from the very bottom of each leg and mark a spot that's centered on the flat base of the leg. For 4 casters, you'll need four evenly spaced mounting points, one at the end of each leg.
Step 3: Attach the Caster Plates
Take one caster and line up the mounting plate with the holes on the rack's leg. Hold it firmly in place so it doesn't shift while you drill. If your caster comes with screws, insert each screw through the hole in the plate and into the pre-drilled hole (or your marked spot). Use your drill to tighten the screws until the plate is snug-don't over-tighten, as this can strip the threads in the iron or bend the plate. Repeat this process for all four casters, double-checking that each is lined up straight and level.
Step 4: Test the Stability
Once all four casters are attached, gently lift the rack back to its feet (or, if it's small enough, flip it upright slowly, using one hand on the base to guide it). Before loading it with produce, do a quick stability test: push the rack gently back and forth, side to side, to make sure the casters roll smoothly and there's no wobbling. If it feels unsteady, go back and check that all caster screws are tightened evenly-sometimes one loose screw can throw off the balance. If your level shows the rack isn't perfectly straight, you can add small rubber shims under the casters that are sitting lower to adjust the height.
Step 5: Add Brakes (Optional but Highly Recommended)
If you're using the rack in a high-traffic area, like a kitchen or retail store, add brakes to two of the casters. This is a simple extra step that will prevent the rack from rolling when you're not moving it. Most plate-mounted casters come with side brakes that you can engage by pushing a small lever-just make sure the brakes work before loading up your rack with produce.
Now, a few pro tips to make your caster upgrade last as long as your iron rack:
First, if you're using the rack outdoors or in a damp area (like a covered market stall), make sure to choose casters with rust-resistant hardware. Steel casters with a powder-coat finish will hold up better to moisture than basic steel or plastic. Second, periodically check the caster screws every 1-2 months-they can loosen over time from rolling across different surfaces. If you notice any wobbly wheels, tighten the screws right away to avoid damaging the rack's frame. Finally, don't overload the rack beyond its weight capacity-iron is strong, but adding too much weight can put extra strain on the casters and cause them to fail prematurely.
I've helped hundreds of customers add casters to their iron produce racks, and the feedback is almost universally positive. One customer who runs a small café told me that adding casters to their Iron Vegetable Racks let them roll the entire unit from the storage closet to the front counter during rush hour, cutting their prep time in half. A group of home bakers I work with now use mobile iron racks to move flour, sugar, and fresh fruit from their storage area to their workstations, eliminating the need to carry heavy bags across their kitchen. Even for commercial setups, the Supermarket Metal Iron Fruit and Vegetables Shelving becomes much more flexible once you add casters-you can rearrange displays for promotions, restock aisles faster, and clean under the rack without having to lift it.


If you're in the market for a durable iron produce rack to start with, or if you have an existing rack that needs casters, I'd love to help. Our team works with customers of all sizes, from home cooks to large retail chains, to find the perfect storage solutions for their needs. Whether you're looking for a compact rack for your kitchen, a large unit for a farmers' market, or a heavy-duty shelving system for a supermarket, we have options designed to last for years. If you have questions about which casters work best with our racks, or if you're ready to place an order, don't hesitate to get in touch. We can also share additional tips for maintaining your iron racks to keep them looking and working their best for years.