


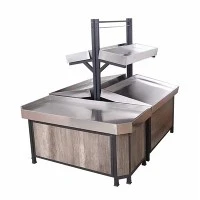


Installing grocery store display racks is a crucial task that can significantly impact the functionality and appearance of your grocery store. As a leading Grocery Store Display Racks supplier, I've witnessed firsthand how proper installation can transform a grocery store's layout, enhancing customer experience and increasing sales. In this blog, I'll guide you through the step-by-step process of installing grocery store display racks, sharing valuable insights and tips along the way.
Step 1: Planning Your Layout
Before you start installing any display racks, it's essential to plan your grocery store's layout carefully. Consider the size and shape of your store, the flow of customer traffic, and the types of products you'll be displaying. A well-thought-out layout will ensure that your display racks are placed strategically to maximize visibility and accessibility.
- Measure Your Space: Use a tape measure to accurately measure the dimensions of your store, including the length, width, and height of the areas where you plan to install the display racks. This will help you determine the appropriate size and number of racks you need.
- Create a Floor Plan: Sketch a rough floor plan of your store, marking the locations where you want to place the display racks. Consider factors such as the proximity to entrances, exits, checkout counters, and other key areas of the store. You can use graph paper or a digital design tool to create a more detailed and accurate floor plan.
- Consider Product Placement: Think about how you want to organize your products on the display racks. Group similar products together to make it easier for customers to find what they're looking for. Consider placing high-demand items at eye level for maximum visibility and impulse purchases.
Step 2: Choosing the Right Racks
Selecting the right display racks for your grocery store is crucial for both functionality and aesthetics. There are various types of racks available, each designed for specific purposes and product types. As a supplier, we offer a wide range of options like Supermarkt Regal, Department Store Racks, Steel Wood Supermarket Shelves, grocery display shelves, and Convenience Store Shelves.
- Consider Your Product Range: Different types of products require different types of display racks. For example, if you sell a lot of canned goods, you might need racks with adjustable shelves and dividers to keep the cans organized. If you sell fresh produce, you'll need racks with proper ventilation and drainage to keep the produce fresh.
- Think About Durability: Grocery store display racks need to be durable enough to withstand the weight of the products and the daily wear and tear of a busy store. Look for racks made from high-quality materials such as steel or heavy-duty plastic.
- Match the Style of Your Store: The display racks you choose should complement the overall style and theme of your grocery store. Whether you have a modern, minimalist store or a traditional, rustic one, there are racks available to suit your aesthetic preferences.
Step 3: Preparing the Installation Area
Once you've planned your layout and chosen the right racks, it's time to prepare the installation area. This involves cleaning the floor, ensuring it's level, and marking the locations where the racks will be placed.
- Clean the Floor: Remove any dirt, debris, or obstacles from the floor where the display racks will be installed. A clean, smooth surface will ensure that the racks are stable and level.
- Check the Floor Level: Use a spirit level to check if the floor is level. If the floor is uneven, you may need to use shims or leveling pads to adjust the height of the racks.
- Mark the Installation Points: Using a pencil or tape measure, mark the locations where the display racks will be placed on the floor. Make sure the markings are accurate and aligned with your floor plan.
Step 4: Assembling the Racks
Before you can install the display racks in your grocery store, you'll need to assemble them. Most grocery store display racks come with detailed instructions and all the necessary hardware.
- Read the Instructions: Carefully read the assembly instructions provided with the display racks. Make sure you understand all the steps and have all the necessary tools and materials.
- Organize the Parts: Sort the parts of the display racks by type and size. This will make it easier to find the parts you need during the assembly process.
- Follow the Assembly Steps: Start by assembling the frame of the display rack, following the instructions provided. Once the frame is assembled, attach the shelves, dividers, and any other accessories.
Step 5: Installing the Racks
Once the display racks are assembled, it's time to install them in your grocery store. This involves lifting the racks into place, securing them to the floor or wall, and making any necessary adjustments.
- Lift the Racks into Place: With the help of one or more assistants, carefully lift the assembled display racks into place on the marked installation points. Make sure the racks are aligned with your floor plan and are level.
- Secure the Racks: Depending on the type of display racks you have, you may need to secure them to the floor or wall using screws, bolts, or brackets. Follow the manufacturer's instructions to ensure that the racks are securely attached.
- Make Any Necessary Adjustments: Once the racks are installed, use a spirit level to check if they are level. If necessary, adjust the height of the racks using shims or leveling pads.
Step 6: Testing the Racks
After the display racks are installed, it's important to test them to ensure they are stable and safe. Load the racks with a sample of products and check for any signs of instability or damage.


- Load the Racks: Carefully load the display racks with a sample of products to simulate normal use. Make sure the products are evenly distributed on the shelves and that the racks can support the weight.
- Check for Stability: Check the display racks for any signs of instability, such as wobbling or shaking. If the racks are unstable, you may need to adjust the leveling pads or secure them more firmly to the floor or wall.
- Inspect for Damage: Inspect the display racks for any signs of damage, such as scratches, dents, or loose parts. If you find any damage, repair or replace the affected parts as soon as possible.
Step 7: Final Touches
Once the display racks are installed and tested, it's time to add the final touches to your grocery store. This includes organizing the products on the racks, adding signage, and ensuring the store is clean and presentable.
- Organize the Products: Arrange the products on the display racks in a logical and visually appealing way. Group similar products together, and use dividers and labels to make it easier for customers to find what they're looking for.
- Add Signage: Use signage to highlight special offers, promotions, and product categories. Clear and visible signage can help customers navigate your store and make informed purchasing decisions.
- Clean the Store: Clean the display racks, shelves, and surrounding areas to remove any dust, debris, or fingerprints. A clean and tidy store will create a positive impression on customers and encourage them to return.
Conclusion
Installing grocery store display racks is a complex but rewarding task that can have a significant impact on the success of your grocery store. By following the steps outlined in this blog, you can ensure that your display racks are installed correctly, safely, and efficiently. As a trusted Grocery Store Display Racks supplier, we're here to help you every step of the way. If you have any questions or need further assistance with installing your display racks, please don't hesitate to contact us. We look forward to working with you to create a functional and attractive grocery store that meets your customers' needs and exceeds their expectations.